You know that feeling when your favorite show freezes right at the most intense moment, or when a short video takes five minutes to load? If weak Wi-Fi has become your worst enemy, don’t rush to blame your provider — or buy a new router just yet. In most cases, the problem can be solved with a few simple tricks, and AdmiGram.com is here to tell you how.
We’ve dug into the essentials of creating a stable Wi-Fi network in your home or office. By following these simple rules, you’ll likely forget what a weak signal even feels like — and your router will finally start working at full capacity.
What to Do if Your Wi-Fi Signal Is Weak
Consider Your Apartment or Office Layout — Walls Matter
When placing your router, pay attention to the thickness, number, and location of walls and ceilings, as well as other physical obstacles in the signal’s path. Anything within range can weaken your Wi-Fi coverage.
Different materials affect wireless signals differently. Metal objects like aluminum or steel doors and partitions usually have the worst impact. Other materials that block or reflect Wi-Fi include glass, water (like an aquarium), mirrors, cabinets, concrete, brick, and walls with insulation.
The fewer barriers between your router and your device, the better your connection will be.
Choose the Right Wi-Fi Mode — Auto Isn’t Always the Best Option
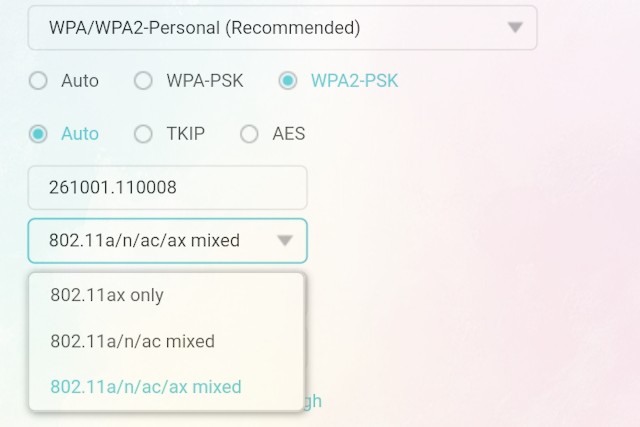
If you open your router or device settings, you’ll find Wi-Fi transmission modes. Most are set to Auto, which usually works fine. But if your Wi-Fi connection feels unstable, try switching manually:
- If your devices are in the same room, use 802.11n, 802.11ac, or 802.11ax.
- If your devices are in different rooms or constantly moving, use 802.11b or 802.11g.
Here’s why this can help:
- 802.11b/g (2.4 GHz): Better wall penetration, longer range (up to 160–330 ft / 50–100 m), and broader compatibility with older devices. Slower speed (up to 50 Mbps).
- 802.11n/ac/ax (5 GHz): Higher speed (up to 9.6 Gbps with Wi-Fi 6+), more channels, less interference — but weaker range (65–160 ft / 20–50 m) and limited support on older gadgets.
Channel Overlap — Too Many Routers, Not Enough Space
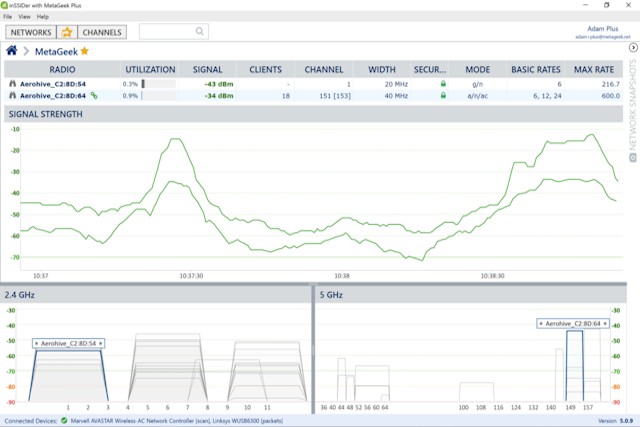
If you live in a dorm, apartment building, or any dense area, you’ve probably seen a dozen Wi-Fi networks pop up on your phone. The issue? Overlapping channels cause interference.
Here’s a simple fix:
Install a free program like inSSIDer on your laptop. It shows all nearby Wi-Fi networks and the channels they use. Pick a free or less crowded channel, log into your router’s admin panel, and change the Channel setting from “Auto” to your chosen one. Click Apply/Save, and you’re done.
Antennas Matter — Size Does Make a Difference

Stock router antennas are often the weak link in your setup. Replacing them can improve performance — but only if you’re upgrading from 2dBi or 3dBi antennas to something like 8dBi. Going from 5dBi to 8dBi won’t make much difference.
If your router has small antennas, get a replacement antenna with a stand and extension cable. That way, you can move it around the room to find the best signal spot without touching the router itself.
When All Else Fails — Add a Wi-Fi Repeater
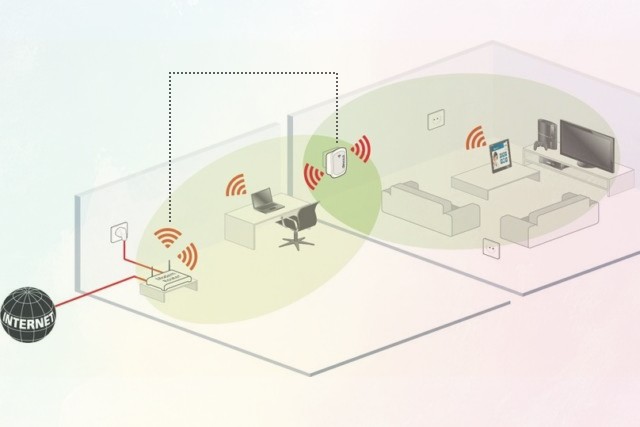
If none of the above helps, try using a Wi-Fi repeater (also called an extender). These small, affordable devices connect to your existing network and expand its coverage range.
Some repeaters are standalone devices, while others are routers that support WDS (Wireless Distribution System) — a feature that lets you connect multiple Wi-Fi access points into a single network without running extra cables.